Saturday, 9 June 2012

Long time no post

I'm sat in front of the television, doing some embroidery on a label, and thought that I really should post some of my recent work. This photo shows Christmas last year, with 8 Christmas stockings under the Christmas tree - I made 7 of them, and the other was made by Mum - over 30 years ago - and has been the inspiration for all the others I've made.
Christmas 2011
The stockings for Christmas 2011 required quite a bit of research - the ones in this photo are just the family stockings, I was commissioned to makesome others - and they needed research as well. The design I dreaded the most was Darth Vader with a Christmas hat - I didn't add the Christmas hat in the end. My grandson (well, step-step- grandson) askied for Darth Vader. My daughter in law's stocking had a rose (made from rose printed fabric, and petals added through machine satin stitch), and a gothic cross. I made one for our baby grandson - who was 2 weeks old on Christmas day. I also filled the stockings - and am now devasted that Hawkin's Bazaar has gone into administration - it is just as well that I still have some things left from last year!


The next stocking - Charlotte, required more thought - the flute was somewhat easier, as I know exactly where the keys need to be - I used silver sequins for the keys - and the tricky part was getting sequins of exactly the right size. The car was a bit awkward too, and since doing it, I have found various books and magazines where there was a car pattern I could have used.

The stockings last year caused quite a few headaches; I had previously bought some mini-buttons / embellishments; these buttons were Christmas trees, stars, gingerbread men and hearts (and silver cookie cutter embellishments of the same patterns). The problem was that I couldn't find the buttons at all, so I then had to buy more - which I did through ebay (where I had sourced them previously) - and that wasn't easy either - finding the same buttons again was not as simple as I wanted it to be.  I'd like to think that I bought 2 packs of these buttons last year - but I can't be certain! I later searched my room / tidied it - and found the original lot of buttons!! I thought that I had used them all - it seemed unlikely that I had managed to use them all, but it was the only explanation I could think of!
A Chelsea supporter was the recipient of the next stocking, and it was due to this one that I made the flute one. An embroidered Chelsea badge was too much for me to complete, and so I used printable fabric. I was a bit concerned about the lacrosse stick, but some net I had bought for the wedding earlier in the year was good for the netting in the stick. Apparently, there is a way of tying knots that is called Spider's Web.

Whilst putting the beads on the guitar (for the frets and tuning pegs) I realised that I was missing an essential colour of bugle beads: pearl. I have white, clear, mother of pearl opaque type, gold - but I wanted a pearl effect. I then looked at ebay again - didn't find the bugle beads I wanted, but I did find some lovely seed beads - with a matt finish, and some of the teachers at Bideford College are into beading, and making bracelets with a spiral rope pattern - something that I want to try but haven't got round to yet.
This last stocking made use of fussy cutting - the football was taken from fabric I've had for some time. I did have to search through a number of boxes of fabric to find the exact piece I wanted. I thought that I had used it all. When looking for fabric appropriate for stars, I thought I had more fabric than it seemed I had. A couple of months later - when tidying and organising my room - I found what I had been looking for previously! The dog on this stocking was a challenge, and the pig is Dick Bruna.

Since discovering in March 2011 that we were going to be grandparents to a baby, I have been knitting as well. I've used sock wool and patterns I've bought from ebay to make jumpers and cardigans. Since then, I've also become an aunt (March 2012), and we're going to be grandparents again in September - so knitting is taking off again. Something that appeared in the baby grandson's stocking last year came from an old pattern book. The pattern book is early 1970's - as mum made me one when I was a baby - Long Skinny Rabbit - or, Mr and Mrs Bunny in the pattern book.
In February and March this year I started again on more of these rabbits. I thought I had enough of the fawn coloured wool, but it turns out that I don't - and it would also seem that the fawn colour is discontinued. I've bought various other makes instead, but no colour is close enough to be used. I will have to have rabbits with different coloured arms and legs to the bodies, heads and ear backs.

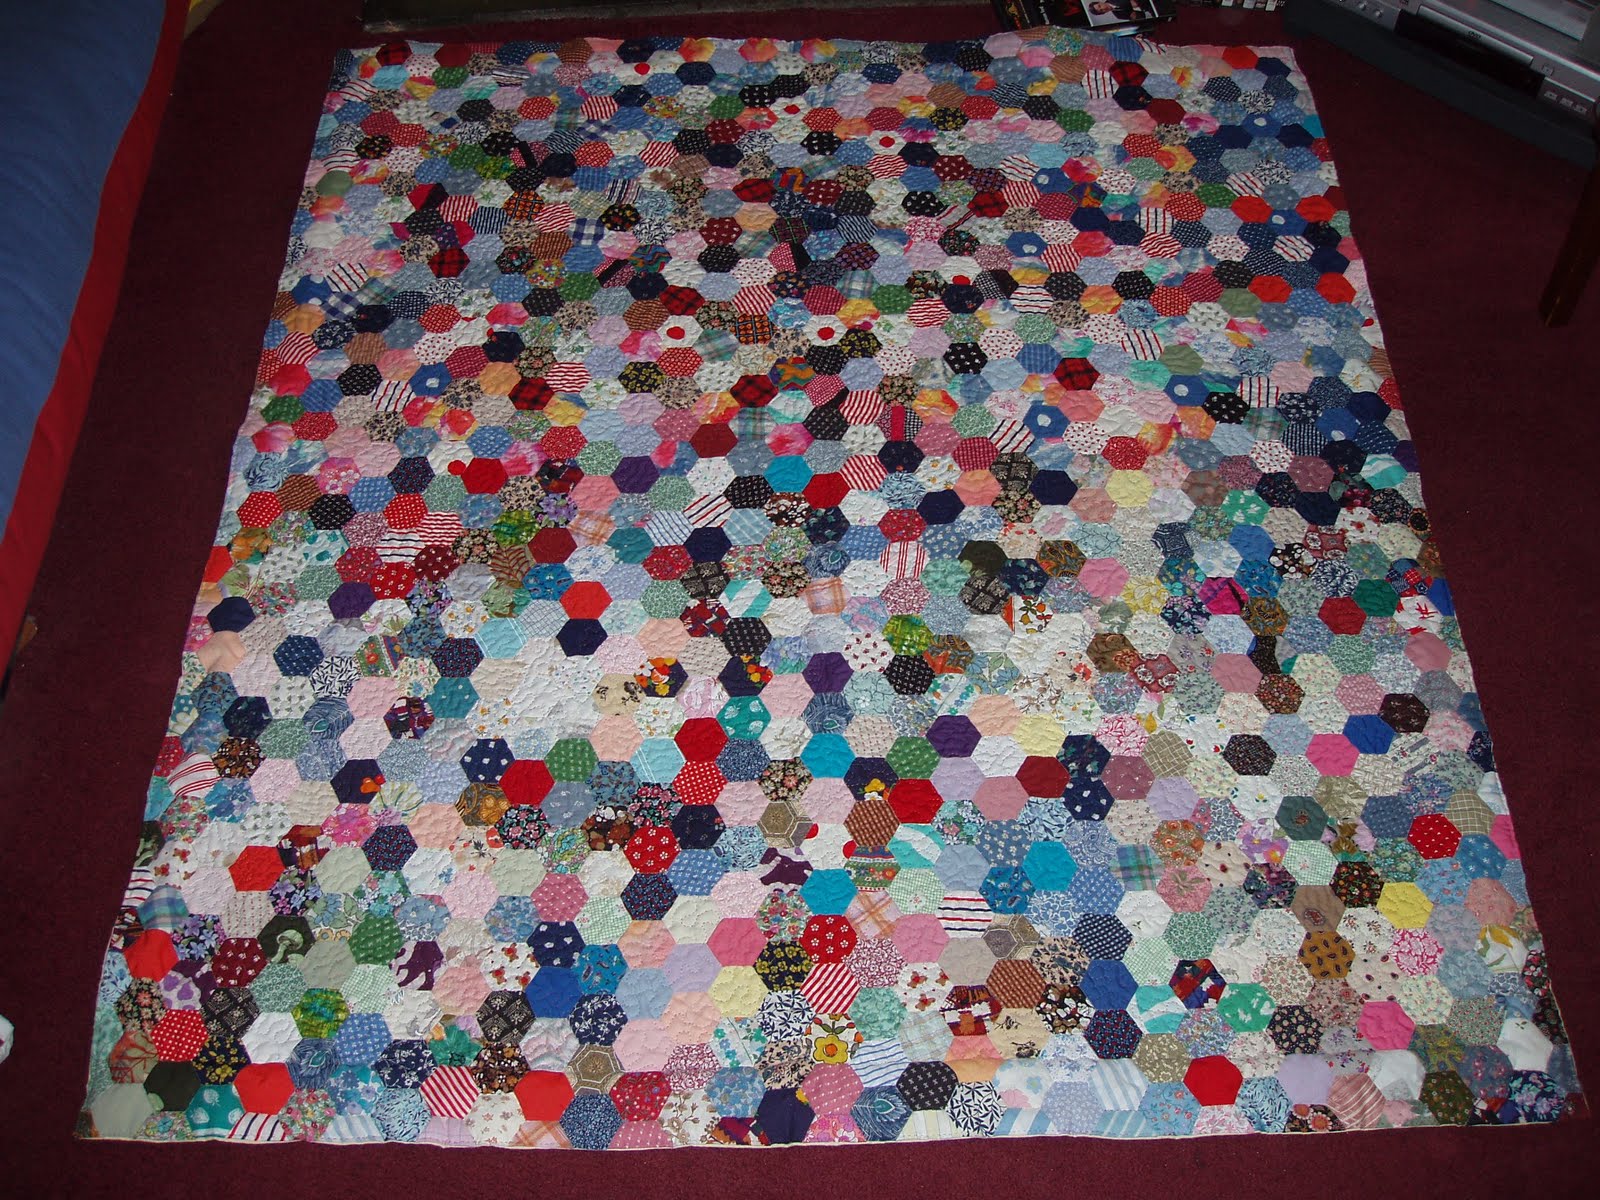
The last photo for this posting is of a 'birth quilt'. I've made a couple of 'I Spy' quilts in the past 9 months (and have cut the fabrics for more of them), and the 'I Spy' quilts are for the family as a whole (the 'I Spy' quilts will feature in another post - soon - I hope!). I have made quilts for individual babies in addition to the 'I Spy' quilts. The individual quilts have a label on the back, which gives the details of their birth - time, date, name and weight. This quilt was made using 'Hopscotch Squares' pattern that I downloaded from the PB Textiles website about 8 or 9 years ago. The pattern and fabric may look familiar - I used pieces that I had cut for my sister's quilt, that were left over once I'd completed the quilt top and pieced the backing. This quilt was made for our baby grandson. I do have a tendency to cut more fabric than I need when preparing quilts; I have kept the fabrics together, and this makes it easier to find them - and I don't have to cut more fabric usually!
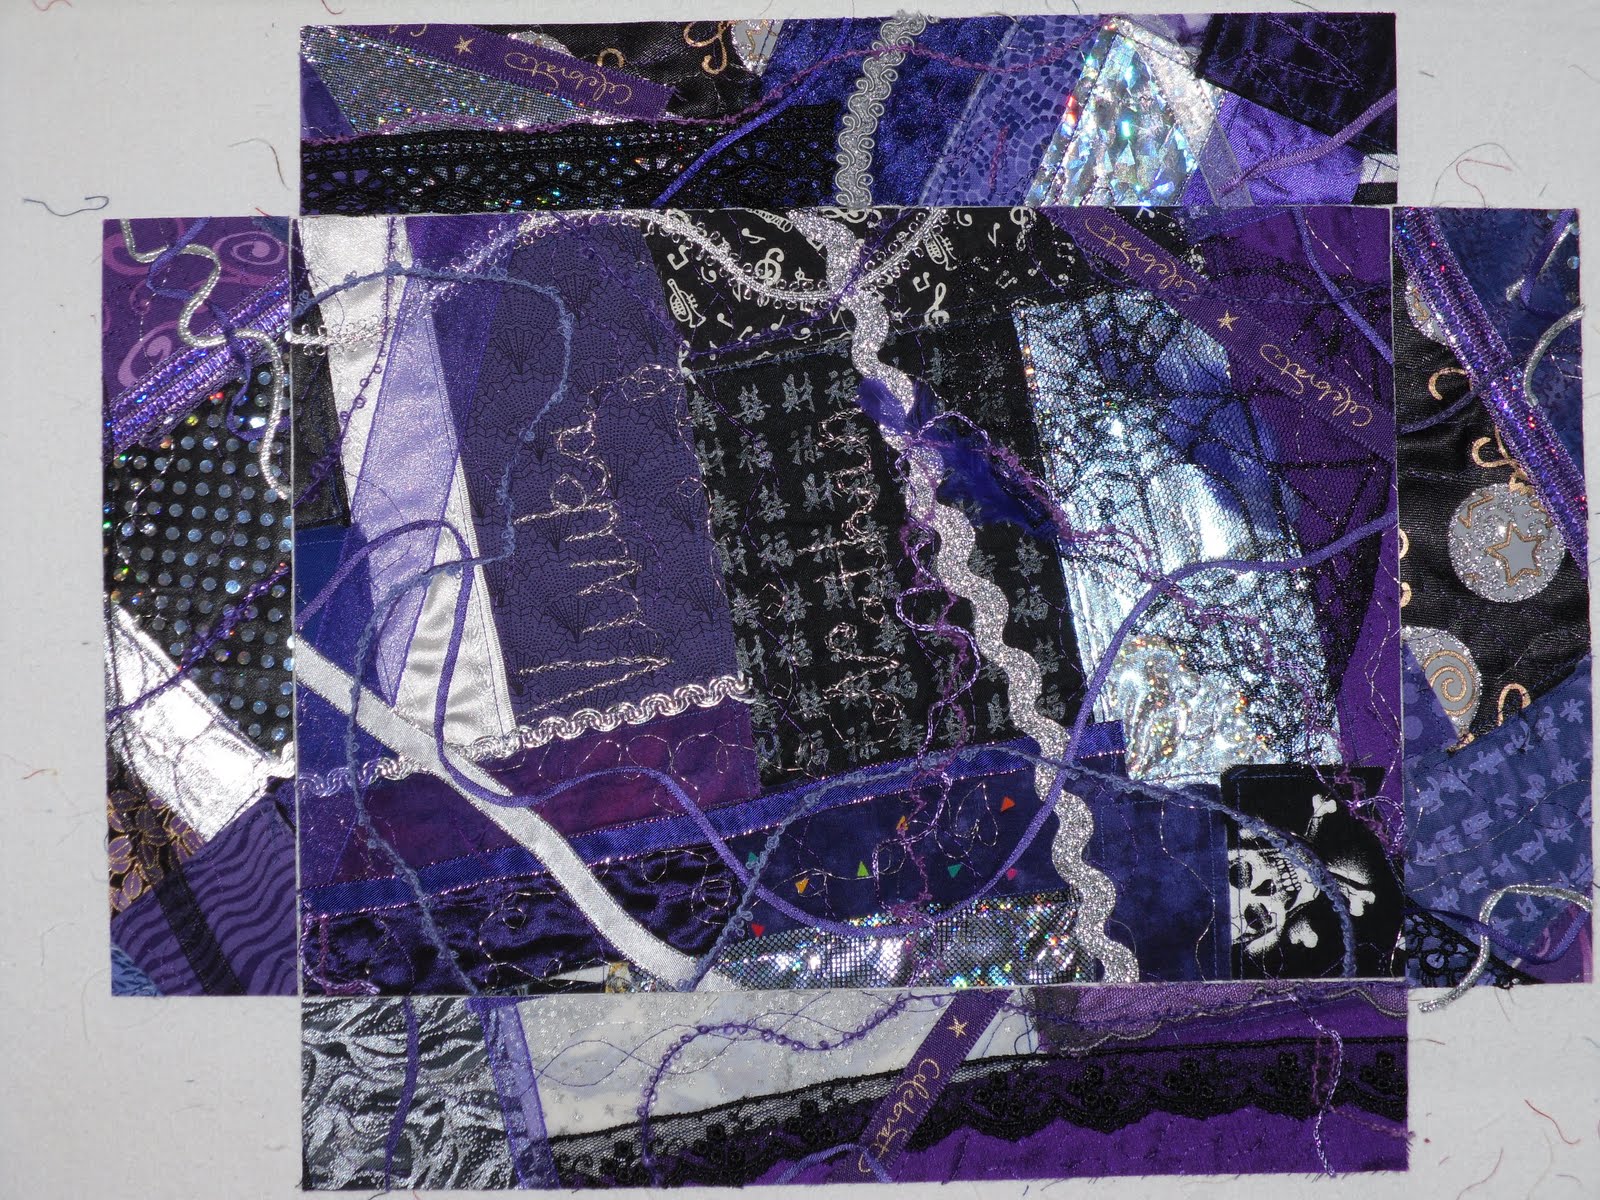
I've had quite a bit of time for creating in the past year. Life has changed dramatically since I gave up teaching full time. I've had some supply work, which shows me that I'm not a bad teacher at all - being quite versatile in teaching a number of different subjects. My husband and I have experienced more change as well - we've been approved as foster carers, and so I'm not doing any supply teaching at the moment. This gives me some time to get more sewing done. I'm going along to Parkham Patchers (when I am able to), and I've started WHo! quilters as well - we meet weekly, for a chat and some stitching. It's great to be able to meet up with like-minded people, and try new skills. Parkham Patchers have introduced me to crewel work - which can seem rather cruel at times, but is also quite satisfying. Current projects include more 'I Spy' quilts, the British Patchwork and Quilting Block of the Month, and an appliqué project too. 

Tuesday, 6 September 2011

Goth wedding

So long since I last posted, but I have been busy. I did get everything done in time for the wedding - pictures of the items and the bride and groom will follow! I've also been knitting - making baby jumpers and cardigans, and a number of quilt tops too. I've just finished a Very Hungry Caterpillar quilt for my great niece, and now just need to take pictures of it before sending it off. I've also done a couple of I Spy quilt tops, and a 'Bright Eyes' pattern made with fabric from a range called Little Blessings. Decided to add a post today before I get on and do the laundry and some tidying. I leave it until later to go into my room, as others in the house are probably still in bed. My thoughts on that shall remain with me for the time being!
This is the finished box for my stepson and daughter-in-law. Usually with my work I use a pre-printed label, one that you can buy in quilt shops - designed as a label. However, those labels would not have been in keeping with the theme of the wedding, so I created one just for the occasion. I used a metallic embroidery thread to do the stitching, and didn't use satin stitch (which I usually do), as working with the metallic thread is a pain in the whatsit.


Rather than lining the box with felt, you can see that I've lined it with purple crushed velvet; again - this is better in keeping with the theme of the wedding. Having made the box, I then had other jobs to do for the wedding. The bride had asked if I could do the alterations to her dress and a bridesmaid's dress. Fine - if you have a sewing machine and a sewing room, you can OBVIOUSLY do dress alterations (those who are not quilters just don't understand that it's not the same thing at all - it's like asking someone who speaks French to translate something in Spanish or Italian - or maybe Swahili). However - I did the alterations, and they didn't turn out too bad - especially considering that I was doing them the morning of the wedding. The photo here shows the latest Mr and Mrs Hutchins - and what a spectacle - and spetacular day it was! They made the front page, and page 3 of the local paper (it was available to be seen online), and they also got a mention in a national daily paper as well. Oh - and they don't have feathers coming out of their heads - it's the plumes on the horses. Speaking of plumes, I didn't have a hat for the wedding, and I thought that I should have some form of headwear - being the groom's stepmum, it seemed the thing to do. So, I put my skills to a new challenge, and after a bit of research, produced the following:
I was able to buy all the supplies in Barnstaple - and around the local area. I know it's a bit like something you might see at the Moulin Rouge, but I thought it was suitable to the occasion. I didn't want it to be all black, as that would have been a bit too sombre. I need a bit more practice at making them, but not a bad first attempt. Next time I'll use a thinner ribbon on the comb - or maybe I'll use a slide if I can find the right sort.

The thing about making the boxes is that I end up with lots of bits left over. In a previous post I showed a card I had made using some bits from a box. This time I really went to town on the bits left over. I made a lucky horseshoe, a ring box, and some brooches for the Hutchins ladies. The brooches I made the night before the wedding, and added some beads as well. The ring box was finished the day of the wedding - after a bit of stress from the best man; however, I stood my ground, and continued with the wedding dress - delivering the two dresses before coming back to finish the ring box.
The last thing that I made with the pieces left over was to make a card for the wedding. I tried to made an envelope - but that was not a great success. However, the card was not too bad, even if I say so myself! The trickiest part of it was cutting the aperture; no ordinary (square, oblong, circle, oval) shape would do. I selected a shape from my Crafter's Companion set. The embossing was fairly easy, but the cutting was a bit of a beggar.
I added some additional bits to the card, in silver - but unfortunately, I didn't get a picture of the finished article. I got DH to write the card - I thought he should do it, being the groom's father. I was quite pleased with the result, and I made another card for another occasion recently. However, that card will have to wait for another post! Now it is time to get on with the latest project - finishing the wallhanging that I started at the Free Cut Curves workshop last Saturday.

Monday, 6 June 2011

Rag Dolls

I realised yesterday that I need to have a bit more of a systematic approach to my blog and the posts! Reading through previous posts, I saw that I had given one a title including the word dolls - and nothing about dolls in it, so I'm going to rectify that right now!

This photo on the left was taken last summer - during Cowes Week. I had made this rag doll for my niece - Maisie; this comes from another Step by Step workshop, this time the tutor was Julia Davis, one of the owners of the shop. The pattern was very easy to follow - and the bloomers extremely easy to make (so much so I've made lots of pairs, and adapted them to trousers). Julia suggested sewing the bloomers to the doll, but I knew that I wanted a rag doll who could be dressed and undressed - and then came the decision to make a rag doll for Maisie - and clothe it too! I've not made clothes before, so this was another new challenge for me. The clothes that the doll is wearing here is a dress that I invented - I changed the style of the skirt (it has a sort of kick-pleat affair at the back, but starting from the bodice), the sleeves were straight rather than being gathered. She has a pair of red bloomers, and a red petticoat under the dress. I also provided her with another pair of trousers and another petticoat. The additional petticoat has a waistband attached. I saw great potential in making dolls clothes, and so set about buying (yet more) fabric that would be suitable for clothes - making something a bit more glamourous. I've started on some ballgown / party dresses in satin - gold with holographic spots, pink with holographic spots, lilac / lavender, and lavender trousers in satin / silk type thing. I'd like to make a jacket with a chinese collar as well, but haven't got quite that far yet. This year for Maisie's birthday I sent down some more clothes for the doll:
I was particularly pleased with this dress. No, I didn't cut and sew all the strips onto black fabric - the fabric came like it already (thank goodness!). I used red broderie anglaise for the sleeves and bodice, and put shirring elastic round the edge of the sleeves. I added a belt, and both the belt and the bodice have press studs to do them up. I also made bloomers and trousers to go with the outfit (I think I sent them both down, although I could be wrong!):

With the bloomers I added shirring elastic around the bottom edge (but a little bit up), to give the appearance of old fashioned bloomers - all that is missing is a little mop cap! (or is it a mob cap? I'm too young to know!)

I love the look of broderie anglaise - it's so feminine and pretty.

The hair for the doll was made from wool, and it was chunky, with 2 'strands' of darker wool, and 1 of the lighter. I spent time unraveling the lighter wool, which gives the wavy appearance. The darker wool has not been wasted. I've used it on my own rag doll (the one made at the workshop), and her hair looks a bit like dreadlocks - it's quite thick.

Going through my photos of projects, deciding which pictures to upload and show on here, I have realised that I don't have any photos of my first rag doll - or any of the clothes I've made for her; I'll remedy that later.

Thanks to Kath for the comment on the last post - and Kath - I will CERTAINLY show pictures of the box I'm currently making, but you are going to have to wait about a month for the photos. It is a policy of mine not to show pictures of WIPs (works in progress) if they are being made as a gift for someone. I only post photos of such projects once the recipient has received the gift! I remember a pupil saying that he had seen my official wedding photos (he was the nephew of our photographer), and I was a bit put out by that; it didn't help that he shouted it out in a lesson!

I've posted a question on facebook - doing a bit of market reasearch, as to how much people would be prepared to pay for a handmade A4 memory box. Any followers or others reading the blog - I'd like to know what your view is on this. How much would you be prepared to pay for a memory box like the ones shown in my earlier posts? Each box is an original - no two will EVER be the same (even if I tried to make them so, I wouldn't manage it!)

Until next time, happy sewing / quilting / crafting

Saturday, 4 June 2011

Branching out

Now that I have a bit more time on my hands, I'm taking advantage of my room. Nathan (stepson) is getting married 3 weeks today, and I'm making him and Vivika a memory box. The colour theme is black, purple and silver - our church won't know what has hit them - and I don't think Nathan and Viv were prepared for our church! Anyway, I've got 3 panels on the go for their box - a different colourway to those I've done previously, but great fun! I'm getting better at using the sewing machine as a pencil to write names, although the pesky rayon / metallic thread has been playing up.

A question was posed to my DH last night - how much would people pay for one of these boxes? I've posted this question on my facebook page, and wait with anticipation (and trepidation (is that actually a word?)) for the answers. Today I thought that I would share a couple of wedding projects with you, - but not projects that the recipients have not yet seen (fair's fair!). The first one is a book - hand made - put the papers together, sewed them together, made the cover as well. Th e cover is made using a technique I learned at a Step by Step workshop. The title of the workshop was 2 inches textured, and I did the workshop in February (I think) this year - I had to pull out of the workshop last year due to family bereavement; there was no way I was going to miss it this time around! The lady who runs the workshop is Vinnie Cable - a very talented lady; I believe she is an accountant by day, and textile artist the rest of the time. She doesn't just use fabric, she uses all sorts of materials in her work - including plastic, tyvek, sweet wrappers, foil from round wine bottles, the tough plastic that you find as pouches of chocolates (e.g. Roses). The technique is one that I love - I've made about 5 or 6 panels using the technique, in different colours. The great thing about it, is that you get such different effects and looks from the number of times and ways in which you cut, rearrange and sew the panel. This book used the panel I made at the workshop. Others used very different colours, but I had a specific idea in mind - something for my sister's wedding - so I wanted white, ivory, cream and gold. To look really effective and give it that 'zing' - you really need to have a way out colour in there - but I was quite happy with how mine turned out - and it gives a chance to use some of the more difficult fabrics (silks, stretchy, velvet, lace). I was also able to use some bits from the panels I made for my step-sister's memory box. I know that I am biased, but I think mine was the best looking one there!

Us quilters are a versatile lot, and having made a memory box for my sister, I used part of the panels for something else. This has now prompted me to seriously think about expanding my crafting repertoire further, and I've made the necessary steps and bought some (most) of the tools and materials necessary. I'm extremely reluctant to throw anything away - and I keep the 'remnants' of the box panels - for use in something else in the future. Caro and Stu's wedding (my sister and her DH) provided an ideal opportunity: cards. I was really quite impressed with how this turned out, and it is special because it is a link with the memory box I've made them. It's also a form of recycling - reducing waste, re-using materials. I now want to start creating a line of wedding cards, and general purpose cards. All I need now is a stamp to show who made it - either that, or I need to create some sticky labels. I have started to look into marketing these things - cost of materials, where to sell, how much to charge, - and the website www.etsy.com is one of the places to go to find similar things, and get ideas.

Having bought some card making materials, I had an idea about how I could use the stampers. I know that I can ink them, and print the design on paper; browsing TV channels brought me to Create and Craft tv - and I saw how the stamps are used with angelina and fusible film. That is really what prompted me to buy the stamps, but the other day I had a flash of inspiration: I have some pebeo setacolour paints, and I could use them to colour the stamps, and stamp onto fabric. Create and Craft channel - one of the best and worst channels I could have found; best because you see people creating and using the items they are selling, answering questions that people ask about how to use the tools and materials; worst - because there are so many items that you think you would quite like to have....seeing the Cuttlebug machines makes me wonder whether they would work with fabric as well....? Also makes me think that the Accuquilt system might be required!


Before I go to continue with my box making, a couple more things to share; two quilts (wallhangings) I made last summer for my classroom - great thanks go to Block Party Studios for their wonderful hand printed panels. These hangings seemed to go largely ignored by the pupils in my classroom, but when they came up to my desk, the hanging was handled, and they were suitably impressed when I told them that I had made them both!

Sunday, 22 May 2011

Thanks again Marlene!

It's been a long time - getting from there to here....oh dear - I've started watching Star Trek: Enterprise, and the theme tune is stuck in my head! However - the sentiment holds true. I finish work on Friday and will be a housewife for a bit, which will allow me to spend more time being creative. So much has happened since last September. I went to Funky Daisy Flowers workshop yesterday, and the picture below shows Marlene's creation. I didn't take my camaera with me this time, so I don't have details or pictures of the other quilts. The beauty and joy of this workshop was that we all created something different, because we didn't have a pattern - we created our own patterns, we free-hand drew the flowers and the gentle curves, and from the same instructions, we all created something very different.

This has given me other ideas of how to adapt this pattern - first I really should finish this version, together with the narrow border and the and piping! However, I've been inspired to consider other fabrics (rainbow fabric to make the flowers - as someone did at the workshop), using shot fabric to create the flowers, and with the rainbow fabric as flowers - how about combining the flower blocks with some reveleation burning? The possibilities are endless!

What else have I been up to that has stopped me updating the blog? Well - work has been very busy, and we've had a bit of a year really - it's been extremely hard work, and we're now looking forward to better things. I've made another memory box - this time for my sister who got married in a castle in Scotland, in April, and also created a guest book for the wedding too. I made the card for the happy couple too, using some of the remainder of panels I'd made up for the wedding box. As I'll have a bit of time on my hands in 5 days time, it's made me think about creating and selling cards, doing a bit of recycling (the remainder of memory box panels). I've done a couple of workshops, and have had to cancel one so that I can attend my step-son's wedding. I'd booked the workshop in August last year - March this year he tells us that the date of the wedding had changed from December this year, to June this year! I did leave it a week or two (possibly longer) before cancelling the workshop, just in case he phoned one day to tell us the date had changed again - and that they were already married!

I'll get on and post more of my projects over the next few weeks - right now though, it's time to get on and do things, so that I'll have pictures to post!

Friday, 10 September 2010

Dolls and quilts!

I've been busy at school this week, but this evening I've really taken an evening off. I've been working all week - in the evenings, and haven't been in my sewing room at all. However - I made the most of the summer holidays by doing lots and lots - and last week I managed to finish something else. Last weekend, Dad and Liz came to visit, and saw our mansion for the first time. I was able to finish Dad's quilt in time for him to take it away. I was really pleased with how it turned out!
This photo shows Dad looking at the quilt, having taken it out from it's covering. I made it as a quillow - so that he can have it as a cushion, or have it as a quilt. He looks quite impressed with it in this photo - and loved looking at all the different aspects of the quilt. I saw the quilt kit advertised on the Lady Sew and Sew website; I contacted the makower website for their pattern, and they sent it to me. The quilt in the pattern is smaller than the one I made - that is to say - I made it bigger.

I used fleece as a backing, it has made the quilt quite cosy - it was quite warm attaching the binding. The picture on the right shows the quilt as a whole; the design was appropriate for Dad, and the pattern was quite easy to follow. The quilting was done on the sewing machine, without using the quilting frame. I tried to make the quilting echo the patterns in the quilt, and also to show the movement / shape of waves, clouds, and wind moving through the dunes.

It was lovely to get the quilt finished in time for Dad to take it with him. I don't know what the protocol is for hospitals these days, but it will certainly be useful during recuperation. I was pleased with the quilting, and it was easy to do once I put my mind to it. As soon as I had decided on the pattern, I was able to quilt it - sometimes drawing the pattern first was necessary, so that I didn't make a mistake. I think that the adaptation of the pattern has been successful.

This weekend I shall make more effort to get into my room, and get on with more projects. Look out for the next post in the blog where I shall (at least I intend to) show the rag dolls I made.

Thursday, 29 July 2010

Busy, busy, busy!

Hi there all,
well - the summer holidays are here and I'm about to get down to my room once again - so many things to do! First off, the boxes. I've made two more big ones since the one for my step-sister; one as a present (commissioned by my mum), and the second as a wedding gift. This one on the right was a 60th birthday present. Possibly, if you click on the picture, you will get a better view of it, of the embellishment.

For those who are interested, I use an Elna 7200. It's a great machine that gets a lot of use. I recently bought a trolley bag for it, which makes it a bit easier to take to workshops - usually I take the Elna 6005 to workshops, as it is lighter. However, it really depends on what the course is. The problem with using one machine for workshops, is that I have to re-learn how to use it.

This second box is the one I made as a wedding present - the bride kindly gave me some of the fabric from her outfit, which I incorporated into the box. She told me that the colour scheme was orange and Cadbury purple. I had great fun in buying the ribbons and some of the fabrics and other embellishments. It was great fun to try 'braiding' - creating little loops and having the ribbons go over each other. The 'quilting' featured the initials of the couple, and other freehand designs. I gave the present sometime after the wedding, as I wanted to include photos on fabric of the day; the bride kindly provided me with a disk of photos and let me pick the ones I wanted to use.

I am currently in the process of making 2 rag dolls - I still need to add faces, but the dolls themselves are done. I wasn't so happy with the hair, so added more, and now regret that decision somewhat. However, I've been playing hairdresser, and tried thinning the 'barnet' a little. I'll put pictures of the dolls on here once I've finished their clothes; as I've not made clothes before, these are proving a little tricky in places - especially as I'm starting to be possibly over ambitious, by wanting to adapt the patterns and create other clothes - longer dresses, shirts, different style skirts, different sleeves, jackets....oh - and a Mary Poppins type apron!

The final thing to show for today is a quilt - made for my cousin's second son; I've shown the quilt for his brother on the blog previously, and you can't make a quilt for one and not the other - which is why I have other quilts in preparation. I was able to deliver the quilt last weekend, and so get a cuddle with the new addition to the family.

The quilt was well received, and with lots of positive comments. I don't consider myself to be that clever with my hobby - I'm just determined, and like putting colours together, and playing with fabric and my sewing machine. This quilt is made from a panel that I had bought, and then I added co-ordinating fabrics to the sides - the co-ordinating fabrics had been a free gift from a website, and just happened to be from the same range. Perfect! I departed from the usual quilt making on this occasion, using fleece as backing instead of wadding and backing fabric. I had to wait until the baby was born to complete the quilt (actually, I didn't start it until after he was born - family and work commitments didn't allow otherwise), as the backing depended on the baby - boy or girl.

This photo on the right shows the young man in question on his quilt - the fleece is super-soft snuggly, and I'd bought it in blue and in pink. It came from a shop in Tunbridge Wells - C & H fabrics (I think) - I know the initials, as they are perfect for me - and a perfect shop for me - but not for my bank account! I've started making another baby quilt for someone at school who is pregnant (a teacher), and also have one to do for a friend who has just had a baby. I need some more fleece like this, but am not sure where I'm going to get it from - any ideas gratefully received.

As you can see, the quilt was put to use immediately, and young Austin appears to love it! Both he and his brother were lying on it on Saturday. Oh, and would you believe that he is just 7 weeks old in this picture? It's true - he had a VERY good weight at birth!

And now, it would seem that it is time for me to retire - to my sewing room that is! I've got clothes to make / finish, a couple of wall-hangings for my classroom, a quilt or two or three or four to finish, a couple of block of the months to work on, not to mention all the other projects I started a while back - they are NOT UFOs - they are WIPs - I will finish them, I just don't know when...

Do you hear that sound...can you hear it? It's getting louder and louder, calling my name...my room is missing me, so it really is time for me to be going!

Sunday, 18 July 2010

Almost the holidays!

It has been a rather busy time lately. This weekend has to be the first one that I've had entirely to myself for about 2 months. Keeping the blog going is not so easy when life takes over, and I've been spending time completing projects. I have now finished the wedding gift box for Mike and Beki, and also the quilt for Austin Hutchby. Photos will follow later. Today I've been working on a quilt for mum, and last week I got going on a quilt for dad. I'm trying to finish the rag dolls - getting the hair on them, and also getting their clothes made - which is proving a bit of a struggle as I've not done any dress-making before. Anyhow, I'd better get back to the tasks that I want to do - I want to get some projects finished this year - so pictures will have to wait until the next post!

Wednesday, 14 April 2010

Thank you Marlene!

Today's post is a big thank you to Marlene Chaffey. I have done 3 workshops by Marlene - all of them at Step by Step in South Molton. I would have liked to have had a link to a website of Marlene's, but I can't seem to find a website for her. Anyway, last Saturday I went to a workshop, with the title - Tropical Breeze. Marlene told us that she had learned the technique from Caryl Bryer Fallert at a class in America - the link shows the quilt that Marlene did a workshop in. Marlene has since gone on and designed her own piece, using the techniques she learned in America. On Saturday she showed us the technique, which uses freezer paper, spray starch and monofilament thread in both the needle and the bobbin. The technique also uses washable non-toxic non-acidic (I think) glue. The glue allows the pieces to be put together without using pins, and makes it very easy to manage the curves.
I spent a little time after the workshop to put a bit more of the piece together - so I had a bit more to show mum and Super Uncle George and Fantastic Aunt Helen. Having got back from my travels yesterday, I spent time today in my room - and put together the whole piece. It isn't finished yet, as I still need to quilt it. It took quite a bit of time today to decide on the colour of the stems; Marlene emphasised that the stems needed to be a strong contrasting colour. Pink was the best fit colour that I could find, having auditioned others - the others just didn't have quite the right effect.
The next piece is the first workshop that I did with Marlene. The title of the workshop was 'Devon Landscapes'. It was the first workshop that I did using freezer paper, and stitch and tear. The quilt that was on display showed a landscape in pastel colours, and that was what most people at the workshop did. However, as my blog tends to show, I don't really do muted colours! I decided to show a Devon landscape in the summer - bright colours. I couldn't decide on the colour for the surround - but eventually I tried the pastel fabric, and thought that it went quite well. After that, I tried to find the right fabric for an inner border; as the song goes - I still haven't found what I'm looking for! I have seen a couple of fabrics that I could use - both of them are grey fabrics - one lighter, one darker. I need to trial them both again, and try to get it finished. It is due to have some foxgloves on it, just outside the the oval border.
The last piece I was going to show is going to have to wait until another time now, as it is about time for me to warm up a bit - and read in bed. I hope to do some more work in the sewing room tomorrow, but I really need to do some school work (don't you hate doing work during a holiday); I've got reports to write, books to mark, homework to mark, coursework to sort out and comments sheets to write; schemes of work to get on with, and also positive comments sheets to compile for my tutor group - as well as another couple of surprises I want to do for them - there are only about 30 teaching days left with them until they go! So - until the next time..... - this is me signing off for the time being.

Tuesday, 30 March 2010

Almost off for Easter

Welcome back again - and a special welcome to my first follower - hi there Kath! Why haven't the rest of you become followers?! I thought that it was really about time that I got another post on here, and I thought that tonight was as good a time as any. Seeing that I have a follower convinced me further of that.

Last weekend saw me at Westpoint, Exeter. I went along to the Spring Quilt festival there, and had a great time! I hadn't planned on going along to start with, but Jennifer Trollope told me that I was going, when I attended her class at Step by Step a couple of weeks ago - and I know that I should do what the teacher tells me!! I thought that I was fairly restrained, but I could not resist the bargains: a 10m bolt of cotton for £10 - thank you Doughty's. It was lovely to see the Step by Step stand as soon as I walked through the door, and great to see Jennifer as well - I get such a lovely welcome from her each time I see her. I'm not sure that I have enough adjectives of the same value to express the pleasure of seeing the Angels of Antique Angel there.

So - what was the best bit of the show? That is a difficult one to answer. There were so many lovely quilts; as usual the brightly coloured ones caught my eye. I especially enjoyed the Engineering Quilts, and the journal quilts. There were some very clever pieces, that I particularly admired; it was lovely to see so many pieces by an individual quilter. Some people at the show thought that it was a shame that the focus appears to have moved away from patchwork, and becoming more about embroidery; I think it is refreshing to see quilters moving with the times, and creating their own pieces, rather than simply reproducing the work of someone else. There was a lovely old quilt on display as well, one which still had the paper templates in it.

So, what shall I show you this time? I thought that I should show you the box I made for my step-sister's wedding:
I was really pleased with the way this turned out; I really enjoyed making it, and I was able to use a lot of fabrics that I already had. I did indulge in the lace and ribbons to go on the box, but I didn't use all of the things I bought. Another view shows some of the embellishment: I couched knitting yarns and some gimps (thank you Jennifer for the info about Texere yarns - and they probably thank you too, as I did indulge rather a lot), and I also added some table confetti that I had collected from other weddings, and from cards and presents from our wedding! I was delighted with the 'free motion' embroidery that I did on the panels to start with. It was good to get the metallic thread working well, and not breaking - I used the Marathon embroidery metallic threads for the quilting. I can't remember how much free embroidery I did, if any - it could be that I just turned the fabric to get the patterns. I used invisible thread to couch the gimps, yarns, and feathers. I was a little reluctant to give away the box, but I did make it with Charlotte and Shaun in mind, so I couldn't really object - and I can always make myself another one.

The idea came from the smaller box I had made at a class last year. I decided to make the wedding box bigger - to make it A4 size - to accommodate the different gifts that you get for a wedding. I will be making other boxes of a similar style; probably more wedding boxes, and maybe even some for friends and family occasions - e.g. new baby, birthday present, special birthday present.

Charlotte and Shaun's wedding was great! It was a shame that Keith couldn't join us - I did feel a bit tearful that I was there by myself for yet another family get-together - as it was another Banks family get-together. However; Keith wasn't very well, and he wouldn't have enjoyed himself, and it would not have been fun for him or for anyone else. It was lovely to see the family again, lovely to spend time with mum, Caro and Stu, and great to see Dad, Liz, Charlotte, Shaun, Maisie, Mike and Kate - and Judy too. I was especially enchanted and delighted when Maisie came toddling over to me on Sunday at the Sun Inn Hulverstone, and saying - well - I'm sure I heard her say Auntie Christine. That was a surprise to everyone - and something really special for me. It was great to be able to give Dad the framed cross stitch I'd done for him. So - to finish with - a picture of my neice.... - the day after her mum and dad got married, and her meeting a dog that was really quite a bit bigger than her - and the smile on her face is great! I'd have liked it if I would have got better clarity photos - but children and dogs rarely stay still for anyone!


Tuesday, 22 December 2009

Timing


It's just after that time in the morning when you get toothache (2.30am) - never mind; it's the school holidays now, and true to form, I have a cold. I'm sat up in the living room, with the Snug Rug around me, hot blackcurrant next to me, contemplating whether or not to pick up the Harlequin quilt to continue quilting it, whilst listening to Radio 2. What else do you do when you can't sleep at night, when it feels like you are too tired to sleep? What have I been up to recently? Well, here is a picture:

This is the stocking that I made for my tutor group - the first CMH tutor group, who are now in their final year. There are several musicians in the class - hence the treble clef, quaver, and guitar; the flower - some of the class (including me) are interested in gardening - and there are two girls with names of flowers; the horse is for those of an equestrian slant; the key is made with Beatles fabric - which says 'All you need is love' - which is the key to success; the star and the Christmas tree are evident - they are Christmas symbols. So - what did I put in the stocking? Each pupil had a present, consisting of: two pens, two pencils, a pencil sharpener, a rubber, a notebook, a mini packet of sweets, and a party toy (e.g. a spring, a pinball game, stickers, a puzzle keyring...). The stocking was also filled with lollipops and chocolate coins. Why did I do this? Well, a treat for my tutees, and also it made sure they had what they need for the mock exams that start in January! I now have a couple of days in which to get a stocking made for Keith, and then I can work on one for the house. The idea of doing one for the house, is so that we have Secret Santa in the house next year! And I shall use the tutor stocking again next year, with my new class - if it is year 7 I intend to do Secret Santa with them.

I was pleasantly surprised with the response from my tutor group; I used the party favours section at Sainsbury's to get the party toys, and I did the stereotyping - boys gifts for boys, girls gifts for girls; and there was one boy saying 'I wanted a spring'. Some of the girls got really excited about getting stickers! There were a couple of interpretations of the horse - one boy (the one wanting the spring) asked why there was a dog on it, and some girls said that I'd forgotten the antlers for the reindeer. There is a ribbon attached to the side (in addition to the ribbon to hang it up), which has the names of all the tutor group on it; I wrote the names on the ribbon with biro - I auditioned fabric pens, but they bled through to the back of the ribbon, and I wanted to use both sides of the ribbon for the names. I shall add another ribbon next year for the new tutor group.

Where did my inspiration come from? Well, it is all down to my mum, and something that she did for my sister and I back in 1978 - 31 years ago. Here it is - the one she made for me:

Later today I shall be back in my sewing room, preparing for Friday, and trying not to get too frustrated when things go wrong, when I can't find things, and when I find that I can't do what I want to do easily. Such is life when you have a cold - it makes me really grouchy, especially when I don't get enough sleep. Anyway, time to publish this post now.

Monday, 23 November 2009

Quilting and television

I've just finished writing emails and updating my blog, and commenting on the Patchwork and Quilting magazine, December edition. There have been some very interesting articles this month, including one on blogging. The author of the article - Sue House - has her own blog, which I've added in the blogs I'm following. As time allows, I shall add other blogs I'm following / trying to follow as well.

I've been extending my quilting skills with Block of the Month projects from Antique Angel. There have been numerous times when I've cursed myself for starting them, but I'm glad that I'm doing them - learning new techniques, trying new things.

There are some interesting competitions in Patchwork and Quilting this month, including one about making a Christmas container - I'm tempted by this, but I think that I may end up submitting a stocking - and it will probably be one that I've made already, and that features on this blog. I suppose I could try something else, but timing is the issue, and there are already so many other things that I want to be working on.

Anyway - the title of this post. I'm just wondering what other quilters do when they sit and quilt. I'm lucky enough to have my own sewing room to go to - although the cats have assumed it as their room - with one of them sitting on the chair I use at the sewing machine, and the other sitting on the cutting table - and on the cutting mat. I like to sit in there listening to a talking book, or watching a film (generally listening to the film rather than watching it). When I'm upstairs doing some hand quilting (on my Harlequin quilt), I sit watching whatever is on television - such as CSI, Bones, Lie to Me, House, Criminal Intent, Deep Space Nine. I've recently seen some programmes advertised for quilting. Some of the CCTv programmes on MyChannel - (Sky 171) about textile artists, and Quilt in a Day on Rural TV (Sky 279 - I think). I shall watch these with great interest. However, all of us have some guilty pleasures - and mine are old soaps. A couple of years ago I watched Howard's Way to it's conclusion (from start to finish), and also Dallas (except the television company didn't have all the series, so kept showing series 1-5 - and I wanted to see the rest of them!). My current guilty pleasure is Dynasty. It is great - it is so bad, it's good! Don't you just love seeing all those shoulder pads, seeing Steven Carrington walking around like a wet weekend and looking depressed all the time; barely hearing what Krystle is saying due to her husky voice; seeing Fallon being such a scheming and manipulative little minx; Blake Carrington looking like a caring patriarch, and actually rivalling JR Ewing for the baddie. This is not how I remember Dynasty - I remember it with Fallon being taken up in a spaceship, and later coming back as someone different, with Alexis Colby coming in, and then the spin off series - The Colby's - with Sable Colby, and Maxwell Caulfield then whisking Fallon away...Oh, what delights yet to come!

Why do I sit and sew with the television on? What do other quilters do? I sit and sew and watch programmes because that is what I did 20 years ago (okay, maybe only 18), when I was at home. I remember Friday evenings sat with my mum and sister in the living room. I would be sat in a gold colour Parker Knoll recliner, with a twin lamp on my right hand side. We would sit and watch television - we would watch Coronation Street (I think), Gardener's World, Love Hurts (who remembers that with Adam Faith and Zoe Wannamaker - I'd love to see that again), and I would sit sewing. At that time it was English patchwork, and I still have the templates somewhere. The Harlequin quilt that I am currently quilting (by hand, as the rest of it has been done by hand), was started later, and I've not yet quilted the quilt I was making at that time. However, I have quilted my first quilt - the one that started this hobby / passion / obsession.

The quilt on the left shows my first quilt. I finally quilted it in 2002, having started it in about 1986. I bought my house in 2002 (which I have since sold), and that summer I went to Hythe to house sit for Grandad Banks. I took this quilt along, and sat handquilting it. It is all done by hand, and has vermicelli quilting on it. I dind't bind the quilt, I used a different technique - I used the self-finish, by folding under the backing, and then sewing through all the layers - using a running stitch. I had already tacked down the seam allowances of the hexagons.

Time for me to publish now, as I've just been asked if I have any buttons (stupid question), and how fast am I at sewing buttons on trousers - so I'm doing a bit of work for a stepson!!

Thursday, 22 October 2009

Wow!

Well, where to start? I'm sitting in the lounge upstairs, with my snug rug over me (a brilliant invention - and one of the best birthday presents ever!). I'm waiting for the postman to arrive - I'm expecting several packages. One of the packages I'm expecting / waiting for is the block of the month from Antique Angel (http://www.antiqueangel.co.uk/). I saw their full page advert in the September edition of British Patchwork and Quilting, and liked the look of a couple of the quilts in the advert. I signed up, and have been cursing myself and the 'stupid idea' ever since! The blocks can involve some very small pieces, which means the piecing can be rather tricky. However, I don't regret my decision - except for the fact that I check the site to see when the blocks are being sent out, and have now seen another new block of the month on the site which I really like the look of! It has been a really good experience for me, as it is making me try different piecing methods, and use techniques that I wouldn't otherwise have tried (Suffolk puffs, for example - they don't really do anything for me).


Possibly you are looking at the date and time I am writing this post. Well, true to form, I have got a cold just before half term. I've fought it as long as I could, but I'm now croaking and coughing; people at school wouldn't thank me for passing it on to them in time for the holiday, so I'm staying at home. I thought I would take a bit of time to update the blog.


For those of you who don't read the British Patchwork and Quilting Magazine, the title of this post refers to the November edition of said publication. I've won the star letter for the month! This means that I've had my letter published, along with the pictures I sent in with it, and for being the star letter, I also get some fabric! I was quite delighted when I read the magazine, and saw it! I had received the publication a day or two after my birthday, and I read it in bed. I had been thinking of skipping to the end of the magazine, but then decided to read it all the way through from the front to the back. The letters page is right at the back, and I didn't realise that I had been published at first. I saw a picture of a quilt (the Celebration quilt), but it wasn't until I saw the quilt for Thomas that I realised that I was looking at my own creations!


Having re-read the letter (several times, just for good measure), I suppose I feel like I might have misled people into thinking that I had made the quilts and the aprons all in the summer holiday. That was not my intention at all, and people looking at this blog will see that the quilts were completed within the past 15 months. It wasn't until I re-read the letter I realised how some people might read it - it was not done deliberately however.


I've been busy with the block of the month projects recently, and also with finishing mum's kimono panels - I'm quite pleased with how they have turned out. I've also mentioned the aprons - so here is a picture of one of them.
The apron was a project featured in P&Q, and I didn't like the colours of the one in the magazine at all, but I thought that I really needed an apron, and I saw that the pattern had possibilities. I used charm pack squares for the aprons, and this worked well, although the seams do not always match up, because the size of the squares is approximate. However, if I let myself be worried by imperfections, I would never make anything! I've made five aprons in all - 2 for me, one for mum, one for Caro, and one for Joan (my mother-in-law). I still have several other projects on the go - but information about those will have to wait for another time, as I can hear the bed calling to me...

Monday, 6 July 2009

Seeing Is Believing

Today I thought that I would show you two quilts. For those of you who are not up on quilting terminology, a quilt is something the consists of a top, a wadding and a backing, and uses some technique (sewing, knotting) to attach the quilt top, wadding and backing together. By this token, it is possible to create pieces that are termed quilts, but would not be used on a bed - they may be 'just' for show.

At around the same time as I was getting on with the Catch 22 quilt, another challenge appeared in the Quilting Arts magazine. The idea was to take a quotation, a phrase, a saying, and create a quilt 'based' on it. The magazine article took us through the process of developing the ideas - writing down the thoughts that occur, the textures, the colours, the quilting patterns, the words we associate with the phrase. There was a choice of 4 phrases, and I chose 'Seeing Is Believing'. I had a lot of different thoughts about this - all of which I have noted in my quilting journal (the type with a magnetic flap and a pocket at the back). My thoughts included the following: optical illusions, religion, senses - sight, sound, touch, taste, smell. I then thought about the images - love, ear, music, radiation, biological threats - religion came in many different ways.

I pieced two backgrounds - trying to create a 'half dropped blocks' design, like the optical illusion. As I had pieced two backgrounds, I could then create 2 quilts. The first quilt I'm going to show you, is the 'senses' quilt - the one to dispute seeing is believing. My whole basis for the quilts has been - Seeing Is Believing - Really?? Can that really be said? Is it really true?

The first symbol (top left) is the radiation symbol - can you see radiation? Do you need to see it to believe it exists? You can certainly see the effects of it, but partly, the fact that you can't see it makes it menacing. The heart - a sign of love - can you see love? It can be seen in the things we do for others, but not the concept itself. The tongue - modelled on the classic Rolling Stones symbol - you can't see taste - you may be able to imagine what it will taste like, but sight can be deceptive. Smell - the sight of something can conjure up the taste, and the taste of items can be extremely powerful memories - but the sight of an item does not guarantee the taste. The two eyes are shown for the sight - one shows an eye clouded over - perhaps with cataracts or glaucoma. Does a blind person believe nothing, simply because they cannot see? The hand symbolises both touch, and can also be seen to show religion and friendship. The ear is fashioned from musical fabric - we can hear things and believe them. The bars at the bottom are to show a graphic equaliser - the thing that goes up and down to show the intensity of music. The last symbol shows bio-hazards - you can't see them (easily). The quilting is sine / cosine waves - how light and sound can be shown.

The second quilt was actually the first one finished! The quilt is the religious side of 'Seeing Is Believing'. Religion is all about believing, without having to see. There are / were some doubters, and they have been shown here - in some form. I did a little bit of research on the internet, for the symbols of different religions. I printed a number of symbols, and used them to create the symbols - using a lightbox to help. I used raw edge applique and bondaweb to attach most of the symbols. Some of the bigger symbols, I used satin stitch. The hand shows stigmata - the idea of Seeing Is Believing and Doubting Thomas. The quilting uses embroidery threads, and I used the names that different religions use for God. I suppose that this quilt could prompt some controversy; that was never my intention. I respect the rights of everyone to believe in what they will - this quilt is a way of celebrating those different beliefs; I certainly don't mean to offend anyone by including the names that God is known by - again - it is a celebration of difference and belief. For all religions - Believing is not Seeing - we don't have to see things to believe them. I was quite happy with how the two quilts turned out, and these were the first 'series' quilts I have done - and they certainly will not be the last!

Sunday, 5 July 2009

Twisted Tiffany Box

Today's project is another one using the revelation burning technique. I did a workshop last week at Step by Step, by Jennifer Trollope, to create the box; I finished it today. http://www.stepbystep-quilts.co.uk/ is the website for Step by Step, and well worth a look! I think that I will have to play with the pattern a bit - maybe try to enlarge it. It isn't perfect by any means, but it's not bad.
I used an Erté inspired print by the Woodrow Studios as the fabric, and three layers of organza. I used vermicelli quilting in gold thread on the 'ears' of the box, and red thread in sort of vermicelli - but with some sharp points too, to emphasise the shapes I had burned out. I added some beads as well - I think I should have added the beads later - some of them broke when doing the outside edge.

The only things I have to do now, is decide which project to do next!

Saturday, 4 July 2009

Performance management

Today's offering is a piece I created a couple of years ago. The inspiration came from Quilts UK - the 2005 challenge, which I think was called 9 patch delight. I mused on the subject whilst completing my first year of exam marking. I doodled whilst listening to pupils mangling the German language, and came up with a design which is not traditional patchwork. My first idea was to have the different size squares each showing a different 9 patch pattern. However, I didn't end up doing that, perhaps as it took longer for the idea to become a project. I'm not sure how the colours were decided, but I do know that the fabrics had to be bright, and with minimal pattern - but not plain fabrics. I got ideas from Patchwork and Quilting magazine (the shisha mirrors - which are real mirrors), Popular Patchwork (the spirals / swirls), and Quilting Arts magazine (the quilting pattern).
I used contrasting colours for the edge of the shisha mirrors, and brightly patterns fabrics for the snakey bits and the swirls - also to give some contrast, and I suppose to give some movement to the piece, and to draw it all together - that is why some of the snakey bits cross some of the squares.

I started by deciding on the colours, and the order of the colours. I cut squares from paper, and then paper clipped the squares together to arrange the layout. This 'template' was smaller than the piece, but I used the dimensions of the squares to scale the fabric to the correct size. Once I had decided on the dimensions and cut the fabric, I then pieced the fabrics individually - straight stitch to start (I think). My brain couldn't cope with cutting the unusual shapes into the squares of fabric, so once I had pieced the squares, I turned the piece over and cut away the excess fabric, before adding the next square. Once the project was pieced, I used satin stitch around the edges of each sqaure, in a variegated thread similar to the colour of the square. The next task was to add the shisha mirrors, which was a very steep learning curve - I didn't realise that the thread mesh had to go through the fabric first - I was trying to create the initial frame on the mirror alone!! - I can't believe I've just used some jargon in here - 'a steep learning curve' indeed - I apologise now, and will try not to let such phrases creep in again! Anyway, once I'd sorted the shisha mirrors, I added the shapes, using raw edge appliqué. Then came the fun part - layering the piece for quilting! I free machine quilted the piece using toning threads, and had a 'crossing squares' type design. I had tried a different design on paper, but preferred the freedom of crossing squares. Once the piece was quilted, I went round the outside edge with satin stitch, to finish it off, rather than trying to bind it.

I'm really pleased with the piece, and now have to find somewhere to show it - in the house of course! I called it 'Performance Management' as I was stretching myself further - leaving my comfort zone if you like, and really experimenting with several different techniques at the same time. I enjoyed creating it, and I did get quite fussy about the shisha mirrors - if it went wrong, I started again, I wasn't going to allow shoddy work on the piece. Some of the shisha mirrors are not perfect - but little in this life is, and they got better as I went along.

On a closing note, I'm really touched (and thrilled) by the comment left on the previous post!

Saturday, 27 June 2009

Celebrate!

Hi there again folks - especially hello to those people who have looked at my blog for the first time today. I must start this entry by saying a big thank you to Jennifer Trollope, who did the Twisted Tiffany boxes today at Step by Step. I have had a look at the explanation I gave in my last entry - and I hope that I haven't given too much detail about the technique - I think it is reasonable but not too much! I'm sure you will let me know Jennifer if it is too much.

Today was great - I got to show off the pieces that featured in the previous entry - and Jennifer even said that my kimonos were as good as hers! What more can a gal ask for? We were all looking for the Jacobean Garden fabric panels - but to no avail. It just goes to show that you have to buy the fabric when you see it.

I used a piece of Erté inspired fabric from Woodrow Studios, in the red / yellow / orange / purple colourway for the box today. However - as the design is quite intricate, and I wanted a lot of different coloured threads on the piece, I haven't got anywhere near finishing it yet. It will not remain unfinished for long, and it certainly will not be a UFO. What I do need to do is find somewhere where I can get more shot organza - apparently there is a shop in Barnstaple - on the ring road bit. I shall have to go and investigate!

So - this post - entitled Celebrate! What is the quilt about? Let me show you a photo to start with:

This quilt is based on a pattern in the Patchwork and Quilting magazine, August (I think) 2008. The fabric is mostly pastel colours - pale green, blue, pink and cream. The pattern shows cakes, chocolates - and glasses of champagne. The photo shows the whole quilt spread out on our bed. I've said that the quilt is based on a pattern, as I have adapted the pattern to make it bigger; I used four panels in the centre, rather than one, and then I included an extra border of flying geese units.

I really enjoyed the the fabrics, and once I had seen the pattern in Patchwork and Quilting, I knew that I wanted to make the quilt. However, the pattern in the magazine was really for a lap quilt, and I wanted a bigger quilt - I have a number of lap quilts already. That is why I decided to make the quilt bigger. I also pieced the back of the quilt. However - the back of the quilt is a very random affair, without any measurements at all. I used my quilting frame to quilt the piece - I forget which wadding I used. However - I used pastel YLI threads, and also pastel Coats Star Magic cotton (the Star Magic cotton is not readily available in the UK, but some USA websites supply it at a very good price) to quilt the piece. I free-motion quilted it with hearts and stars on a 'ribbon' - I suppose the hearts could look a little like ivy leaves on a vine. The stars are five pointed stars, with the lines crossing each other.

I really can't explain the delight I have in this quilt! It is so good to have it on the bed, and to be able to snuggle up under it. I can also take it down to my sewing room, and wrap myself up in it - something I haven't been able to do with any of my other quilts - which have been lap sized quilts. I shall let you into a secret now - when I took the photo, the quilt was not finished. There were a few threads left to tie / sew in, and I hadn't added the label either. However, the quilt is finished now - including the label.

So, that is all for this post. New visitors - remember, you can leave comments . I can also moderate the comments. But just to finish this post, I shall show you the remaining Jacobean Garden panels - I suspect that quite a few people will be searching for them high and low for some time to come!